Copyright Donna Hulka 4/8/2004


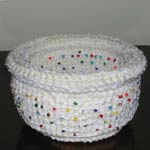
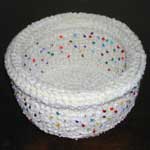
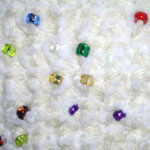
Click the thumbnails for larger images.
You may crochet these baskets for personal use, charity, or profit. You may NOT sell the pattern itself under any circumstances, neither individually nor in any compilation of patterns.
Materials
Yarn: Approximately 2 oz each of Red Heart Baby Teri, Color 9121 Yellow and Red Heart Super Saver, Color 313 Aran. Entire project is crocheted with two strands, one of each yarn, held together.
Hook: Size H
Notions: One old CD; Create-A-Craft large rocailles, Color 02-Multi (can be purchased at Walmart), or whatever beads you want.
Spiral Circles (make two)
Do not sl st to join unless indicated. You will be crocheting rounds in a spiral, so mark your first stitch on each row or you will never find it!
Use a split-ring marker, safety pin, or piece of yarn. Remove the marker when you start the next row.
Ch 3, sl st to form a ring. (If you have a difficult time working in a ch-3 ring, you can ch 4.)
Round 1: Ch 1, 8 sc in ring (remember, don’t sl st to join).
Round 2: 2 sc in ea sc around: 16 sc.
Round 3: (2 sc in same sc, 1 sc in next sc) around: 24 sc.
Round 4: (2 sc in same sc, 1 sc in each of next 2 sc) around: 32 sc.
Round 5: 1 sc in each of first 2 sc, (2 sc in next sc, 1 sc in each of next 3 sc) around to last 2 sc, 2 sc in next sc, 1 sc in next sc: 40 sc.
Note: The reason for starting with 1 sc in each of the first 2 sc on this round (and doing a simlar thing on Round 7) is that I like to stagger my increases around the round. Starting out with 2 sc in same st right away seems to eventually make my rounds angular around the edge, rather than nice and round.
Round 6: (2 sc in same sc, 1 sc in each of next 4 sc) around: 48 sc.
Round 7: 1 sc in each of first 3 sc, (2 sc in next sc, 1 sc in each of next 5 sc) around to last 3 sc, 2 sc in next sc, 1 sc in each of next 2 sc: 56 sc.
Round 8: (2 sc in same sc, 1 sc in each of next 6 sc) around: 64 sc. Join with sl st to 1st sc.
The circle should be about the same size as the CD. If it is not, do not join with sl st yet, and add another round.
Fasten off. Mark right side (helps keep you on track when beading and assembling the basket).
Basket Body
Apply white glue or nail polish to make the end of the RH Super Saver yarn into a pointy tip for threading the beads. Thread beads on the RH Super Saver yarn. I used approximately 300 large rocailles. You will have to push the beads away from you, along the yarn as you crochet.
With right side of spiral circle facing you, attach beaded yarn with a sl st in flo of one of the sc around the edge.
Row 1: Ch 1, sc in flo of each sc around, sl st into both loops of first sc to join. (Note: This row forms a ridge, which you will later use to whip stitch the two spiral circles together.)
Row 2: Ch 1, turn (yes, turn!), sc in blo of each sc around, randomly working beads in as you go, sl st into both loops of first sc to join. Note: Beads worked on this row (and all other even rows) will show only on the inside of the basket.
Row 3: Ch 1, turn, (sc, inserting hook into both blo and unworked back loop of the sc below on the previous row) in each sc around, randomly working beads in as you go, sl st into both loops of first sc to join. Note: Beads worked on this row (and all other odd rows) will show only on the outside of the basket.
Row 4:-14: Repeat Row 3. You may add more rows if you want a taller basket.
You may have used all of your beads by now, or you may wish to continue beading the entire basket. The basket pictured here stopped beading on this row.
Row 15: Ch 1, turn, (sc, inserting hook into both both front and back loops and unworked back loop of the sc below on the previous row) in each sc around, sl st into both loops of first sc to join.
Row 16: Ch 1, with outside of basket facing you (turn if necessary) sc in flo of each sc around, sl st into both loops of first sc to join.
Round 17: Ch 1, do not turn, sc in flo of each sc around, sl st into both loops of first sc to join.
Round 18-20: Repeat Round 17.
Fasten off.
Assembly
With the wrong side of remaining spiral circle facing the bottom side of the basket, whipstitch it to the bottom of the basket, whipstitching through both loops of edge scs on the free circle and through the ridge of stitches left by Row 1 of the basket body. After whipstitching a little more than half way around, insert CD, shiny side facing the interior of the basket, and continue whip stitching around. Work in ends.
Abbreviations
blo = back loops only
ch = chain
flo = front loops only
sc(s) = single crochet(s)
sl st = slip stitch
st(s) = stitch(es)

3 responses so far ↓
1 Elizabeth // Apr 3, 2008 at 2:27 pm
How Cute!!! I can’t wait to try making it.
2 Barbara // Jul 4, 2008 at 12:05 pm
I think its cute I will try and make for some Christmas gifts.
3 Saman // Nov 15, 2008 at 2:54 am
it’s a really sweet basket and the colourful beads on white background add an elegance to it.it’s easy to crochet too
Leave a Comment